

see also: Anterior Pericranial and Galeofrontalis-Pericranial Flaps; Anterior Craniofacial Resection with Formal Anterior Bifrontal Craniotomy
Below represents one of multiple options:
GENERAL CONSIDERATIONS
Pediatric craniosynostosis repair is most often indicated for cases of craniosynostosis - a congenital defect that manifests as premature closure of one or more of the cranial sutures. The consequent skull deformity is addressed in accordance with the suture(s) that are fused. The specific details the surgery will differ dependent on the sutures affected.
PREOPERATIVE PREPARATIONS
- Radiologic Evaluation
- 3D CT is used
- While sagittal craniosynostoses are more common, these are typically done without advancement of the frontal bar by neurosurgery alone.
- 3D CT is used
- Pre-op labs, workup
- Type and screen - have blood in room (at least 1 unit, split)
- H/H - calculate MABL
- weight - calculate max 0.5% lido
- Consent for Surgery
- Bilateral craniotomy, craniectomy and cranioplasty with bilateral (unilateral) lateral canthus advancements with strut grafts.
- Risks: Bleeding, infection, need for transfusion, need for further procedures, seizure, coma , stroke, death.
NURSING CONSIDERATIONS
- Room Setup
- Stadium table for the scrub nurse. This is positioned to come over the operating table prior to draping in order to have both close access to instruments and to have an escalated surface for affixing retractors
- Table is turned 90 degrees away from the door after anesthesiologists have intubated and placed all lines
- 3 operative overhead lights are used. Loupes. No headlight.
- Instrumentation and Equipment
- 8/5mm burr drill
- Neurosurgical footplate saw
- 3-0 vicryl, 4-0 neurolon, 4-0 nylon
- Resorb-X plating system
- Medications (specific to nursing)
- Inject 0.5% Lido with 1/200K Epi.
- Dr. Menezes prefers to use 50% of body weight (e.g. 8kg=4ml).
- May use 0.25% Marcaine at the end of the case (1ml/kg) - not typically done
- Prep and Drape
- Foam is placed under the lower body.
- Small foam placed under both upper extremities
- Pad all pressure points and/or lines
- 2x2" Reston is placed in the sternum/chin fold to pad the chin once the neck is placed in flexion
- Shave head and save hair. Clean with chlorhexidine swab to decrease S. aureus load prior to official prep
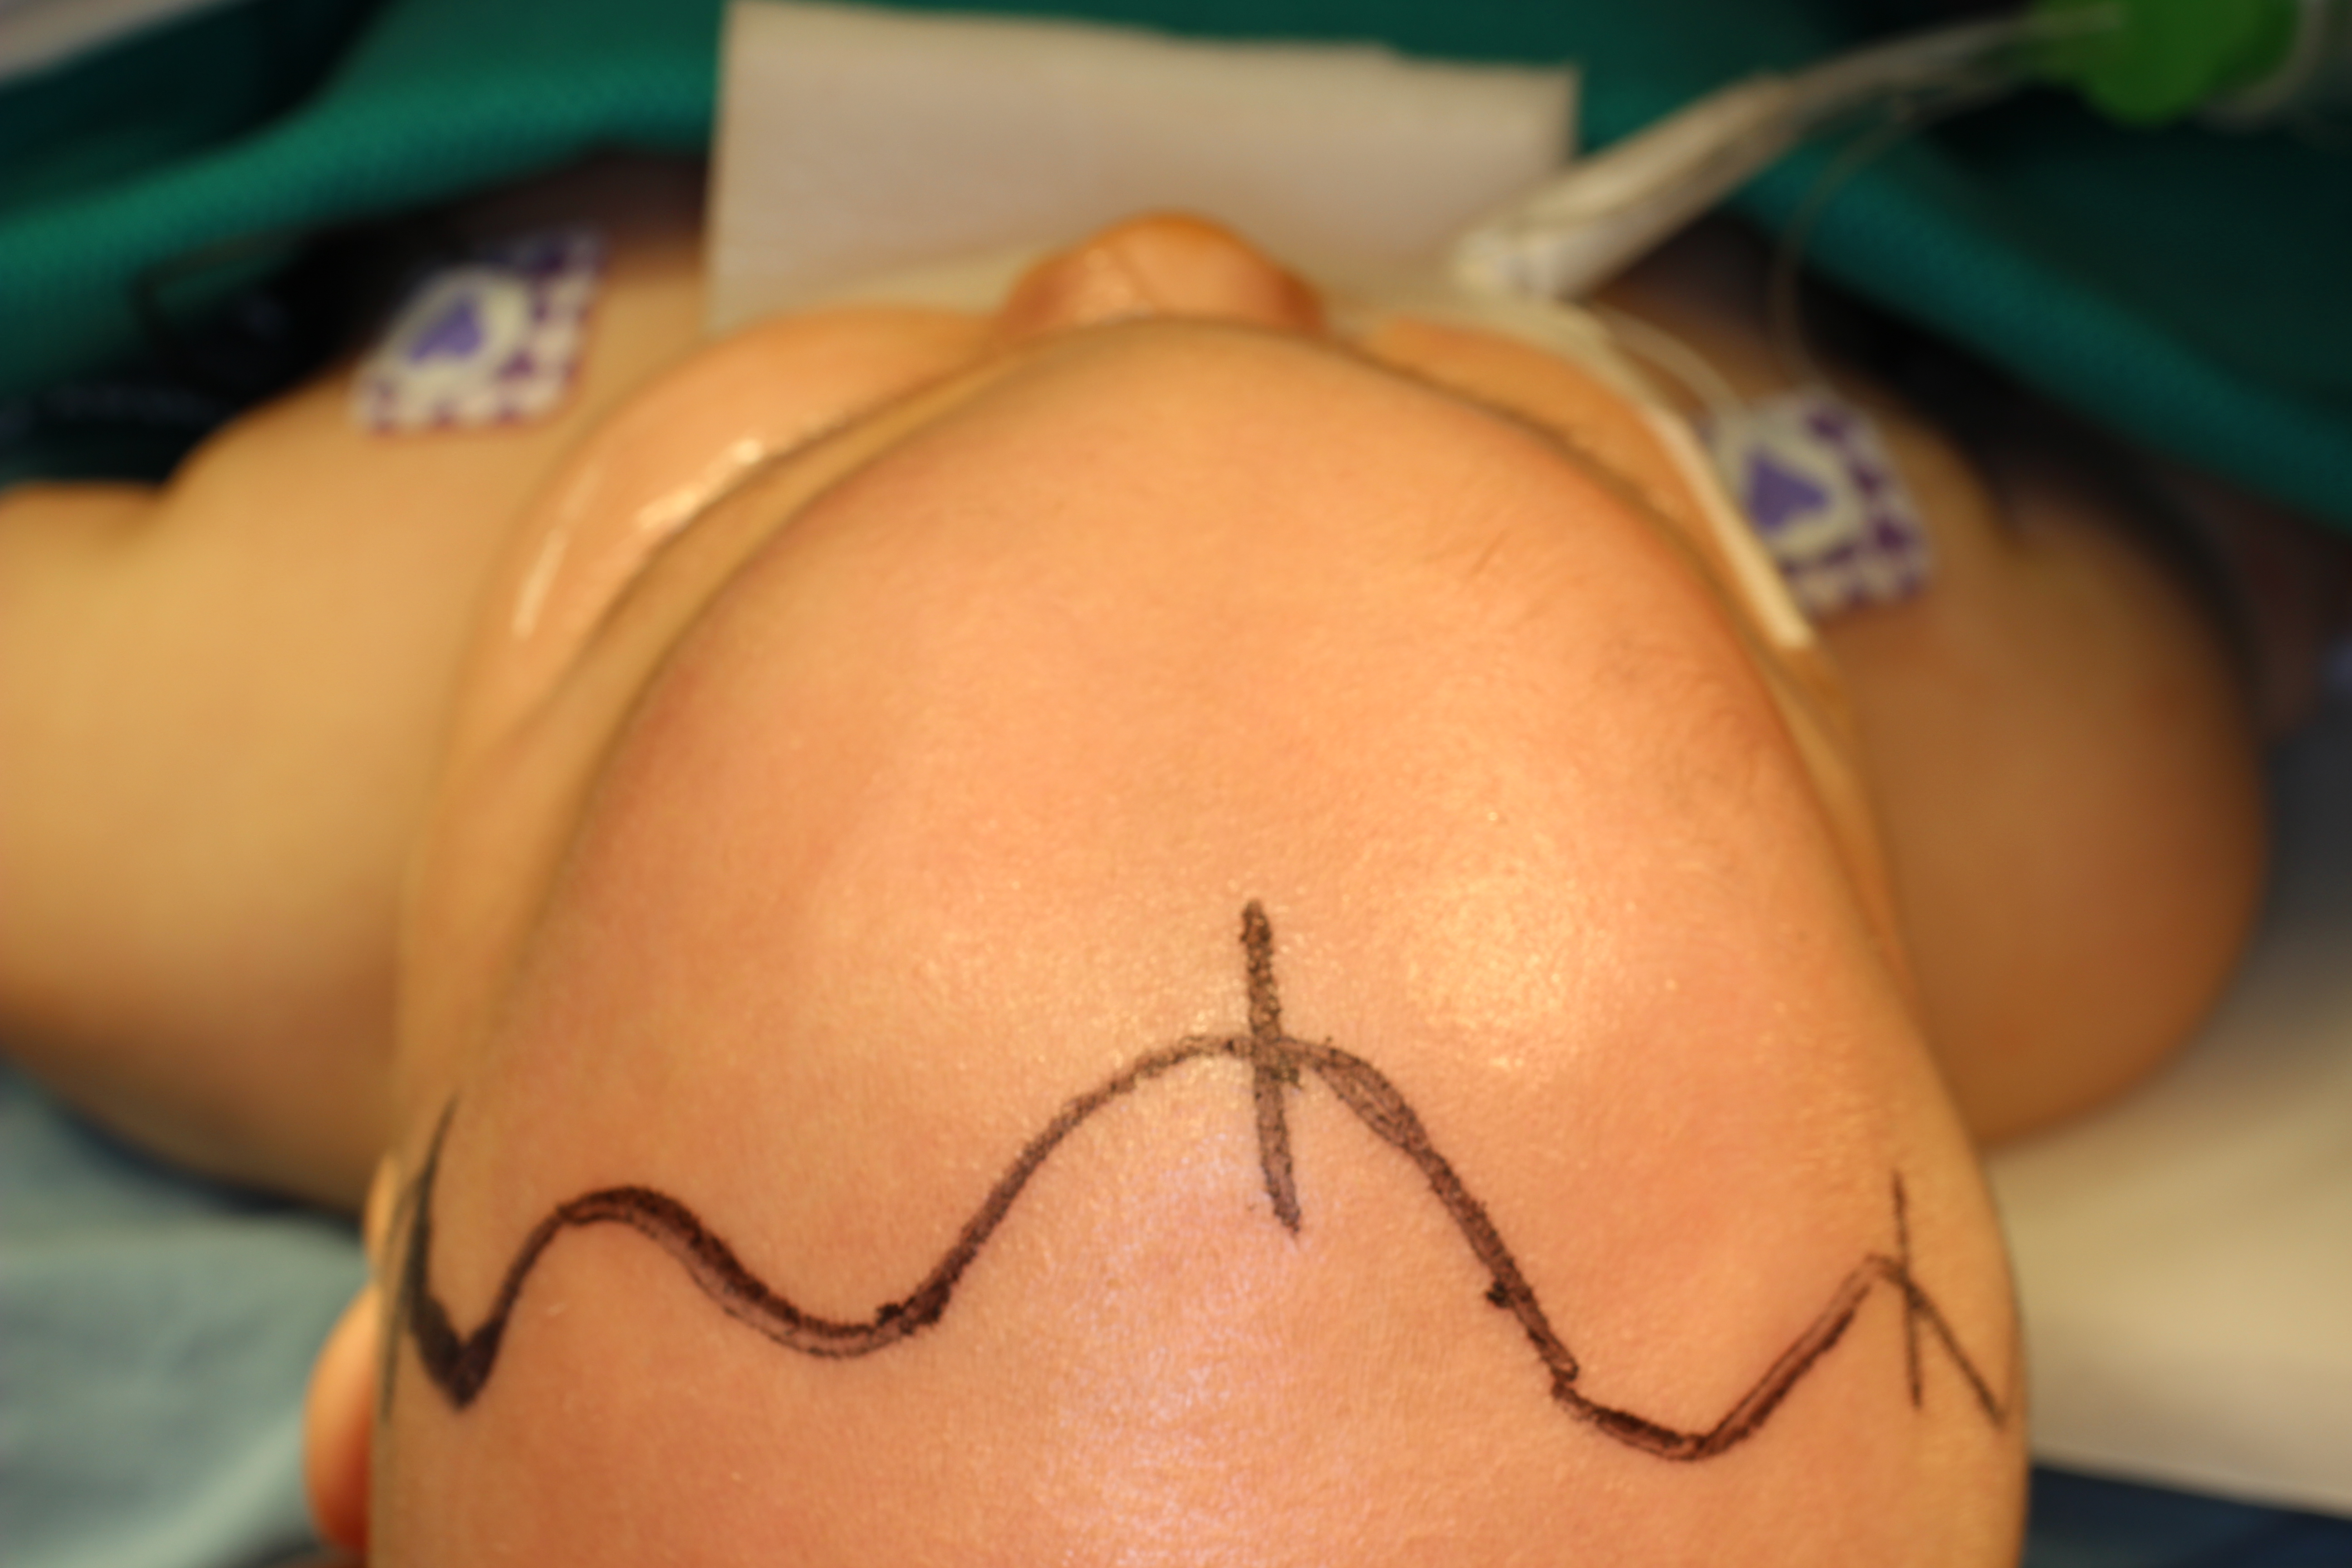
- Classic "wavy" or zigzag bifrontal craniotomy incision is marked both before and after prep, make it thick so doesn't wash off with prep. Hashmarks helpful for closure. Use landmarks to make sinusoids symmetric.
- Betadyne prep
- Drains and Dressings:
- Bacitracin
- Neurosurgery dressing: Adaptic. 4x4’s. Elastoplast, Kerlix, Stocking cap
- Consideration 6 (Special Considerations)
- Sub Con
ANESTHESIA CONSIDERATIONS
- Hemodynamics
- Should have PIV of sufficient caliber to transfuse and arterial line
- Have typed and crossed blood in the room.
- Our neurosurgeons prefer to have 1:1 (1ml for 1ml) replacement of blood throughout the case with 0.5ml for 1ml replacement as a bolus at the end of the case.
- Intracranial pressure
- Begin to hyperventilate once the surgeon nears the calvarium.
- Goal is PC02<30 in order to decrease ICP
- Consideration 2
- Sub Con
OPERATIVE PROCEDURE
- Cranioplasty
- If needs lateral orbital advancement – will sometimes require going through temporalis to get to pterion. If not, can spare temporalis muscle.
- double prep-betadyne
- square off with green cloth towels just below orbital rim, cover ears but leave pre-auricular area exposed (base of incision), vertex/posterior scalp. Staple these followed by:
- Ioban, cloth, steridrapes, o drape - suture in with silk.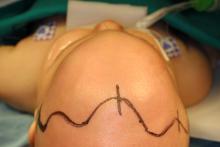
- zigzag incision – mark before and after prep. Inject 0.5% Lido with 1/200K Epi. Dr. Menezes prefers to use 50% of body weight (e.g. 8kg=4ml). May use additional saline to hydrodissect - Incise with direct pressure on scalp above and below to minimize blood loss. Protected blade. Can use handle to bluntly dissect. Can insert elevator and use to guard. Can finish with scissors or Colorado needle tip cautery
Clamp scalp (Leroy clips) with each segment. Raytechs under clips to protect the hair follicles. 5-6mm b/w clips to avoid hair loss. 2/segment (zig or zag).
Incise periosteum with bent Colorado needle tip cautery in a loosely sigmoidal fashion
Undermine with freer up to orbital rim. Bone wax +/- FloSeal for bleeding. Rake to retract.
Use osteotome to release inferior edge of supraorbital foramina to preserve neurovascular bundles while freeing up the coronal flap
May use cutting bipolar to dissect temporalis and over orbital ridge
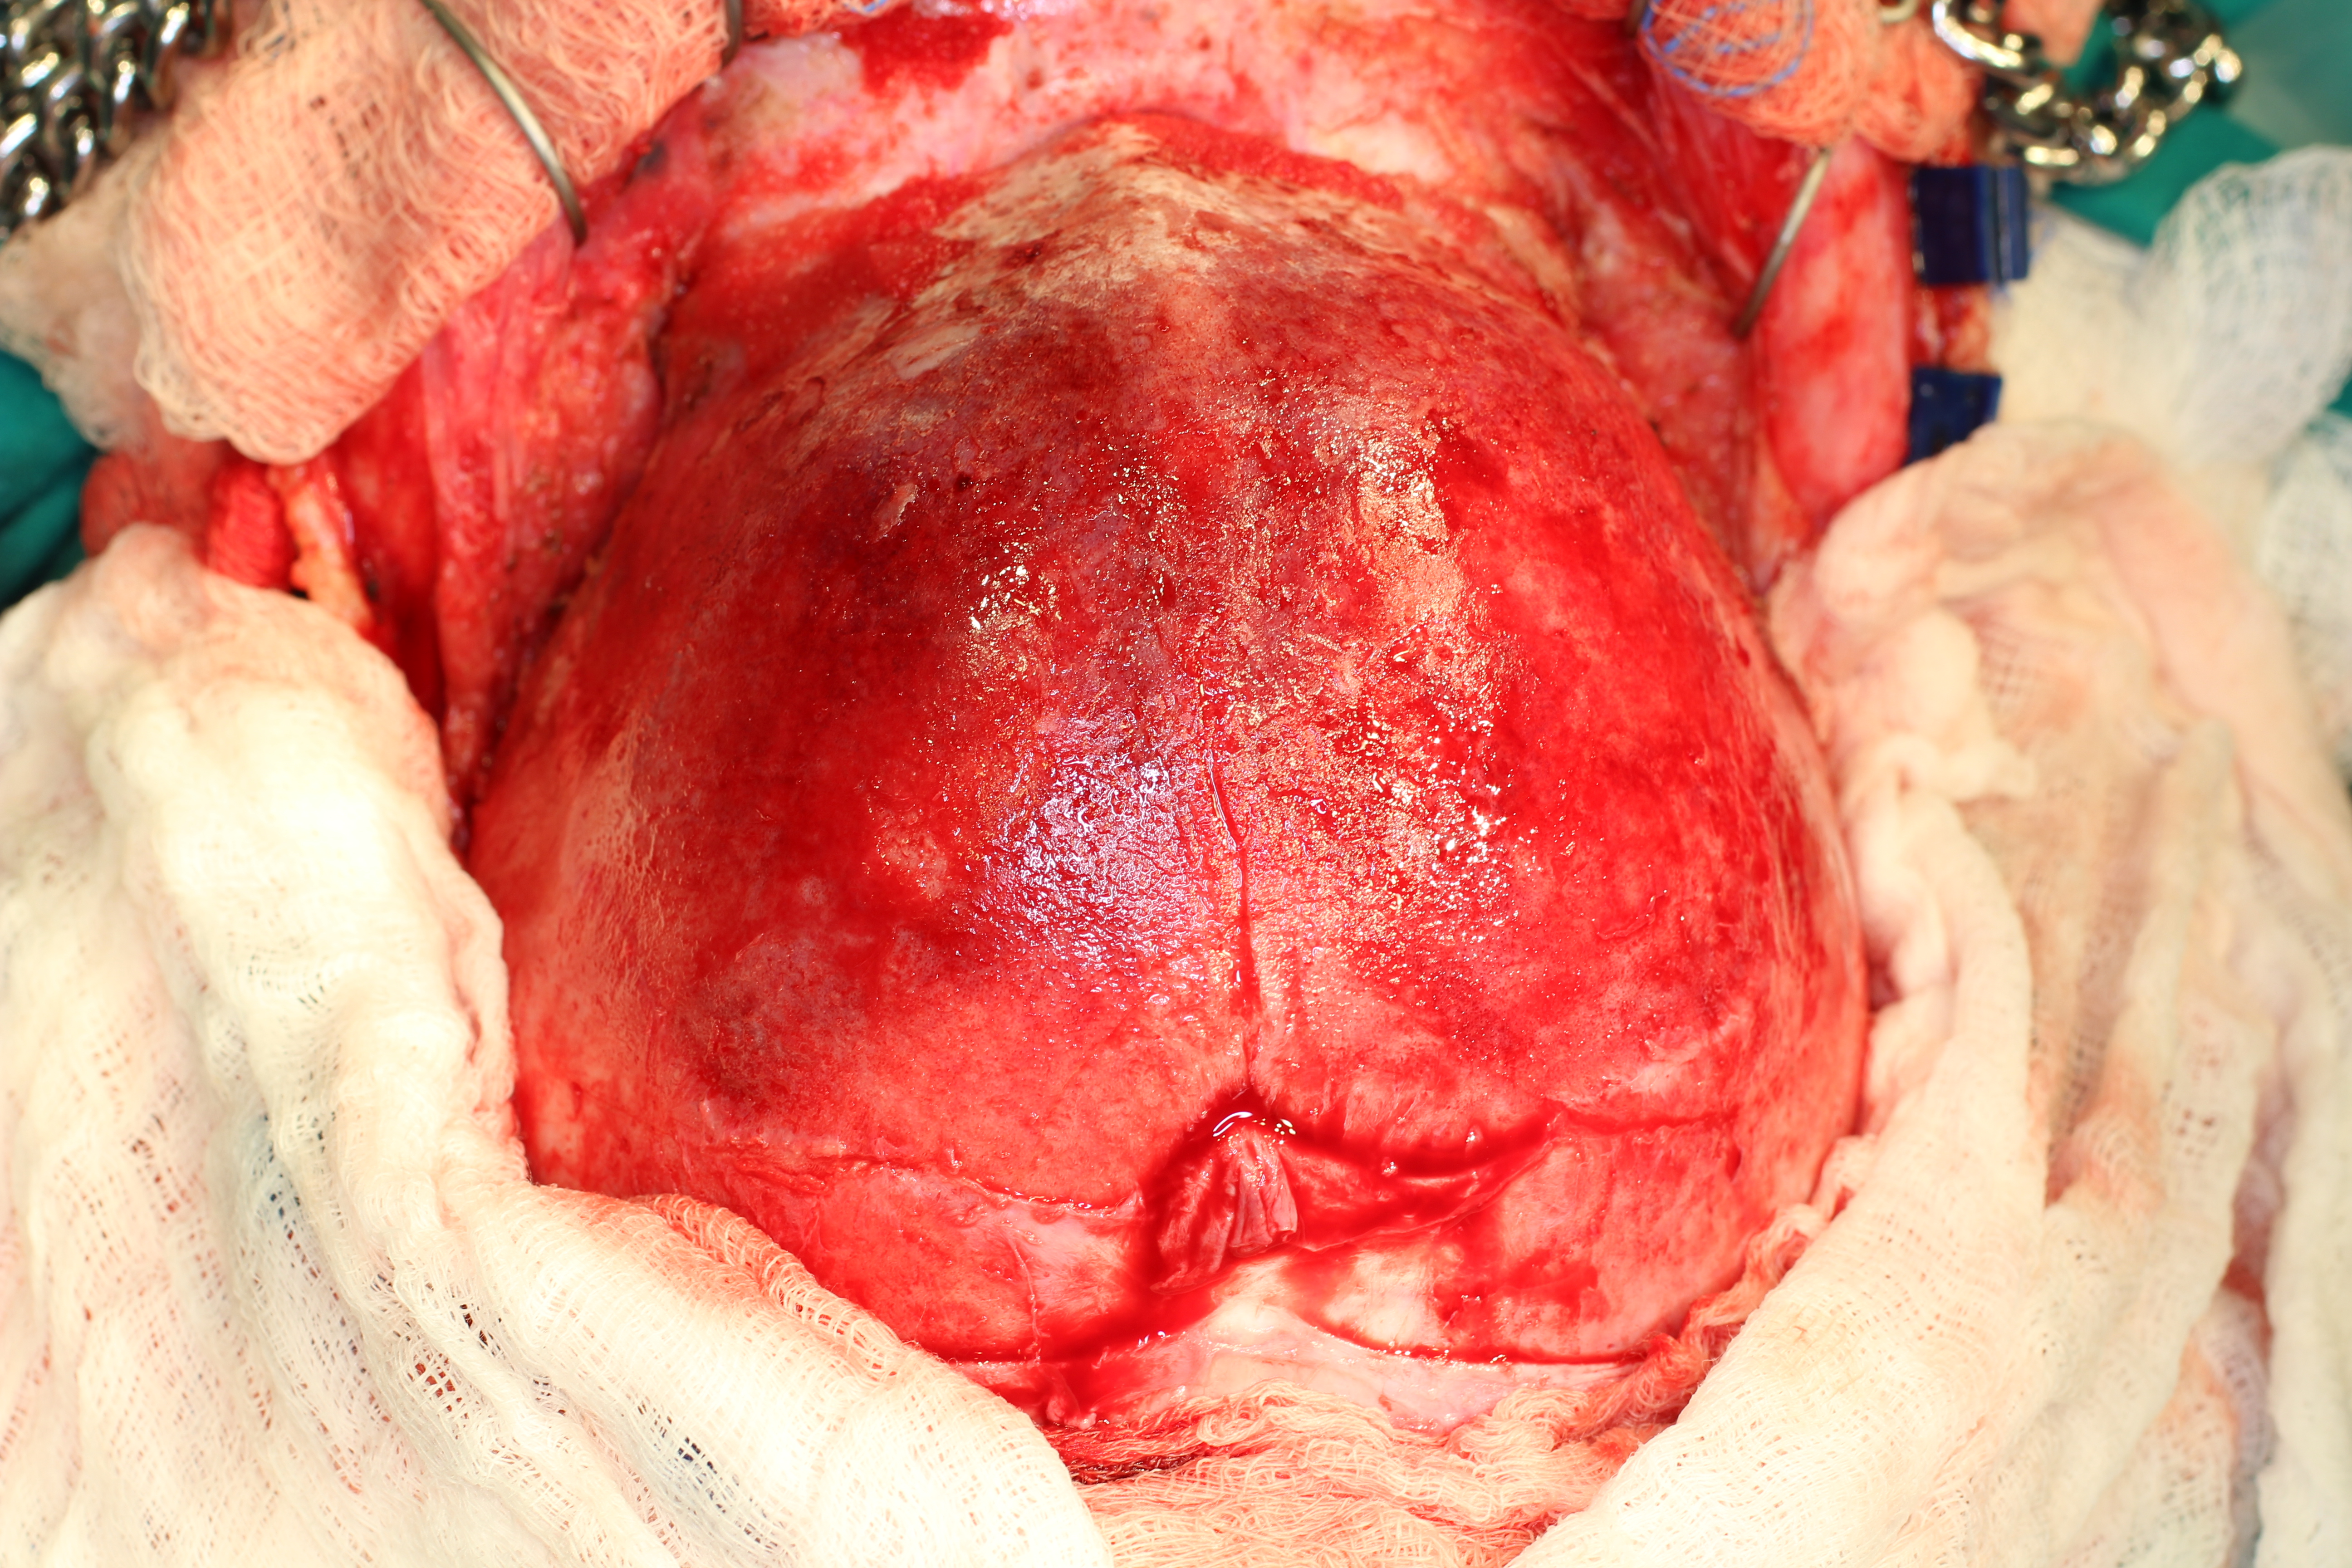
Once flap developed, Adams triple-chain hooks and rubber bands to table for anterior flap retraction, single hook and rubber band retraction for posterior retraction. Need to undermine posteriorly to fre up scalp to use for closure which will be tighter .If needed – can make a transverse relaxing incision in the under surface of the galea.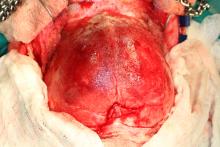
- Mark frontal bone flaps.
Drill pilot holes first anteriorly above orbital rim using aspacranial perforator drill 8/5mm size. Ideally, stay at least 1cm away from midline to prevent damage to sagittal sinus. Save bone dust, for use in closure.
Release dura from fontanelle and pilot holes using curette
Use foot plate saw to connect pilot holes. This has a right angle guarded tip to prevent damage to the dura.
Elevate bone flap and remove
At this point you may encounter bleeding from the sagittal sinus. Use bipolar judiciously.
Midline calvarial strip to nasal root Then osteotome. Nasal root bone wedged removed (sometimes)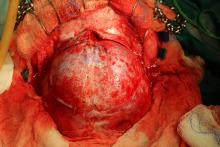
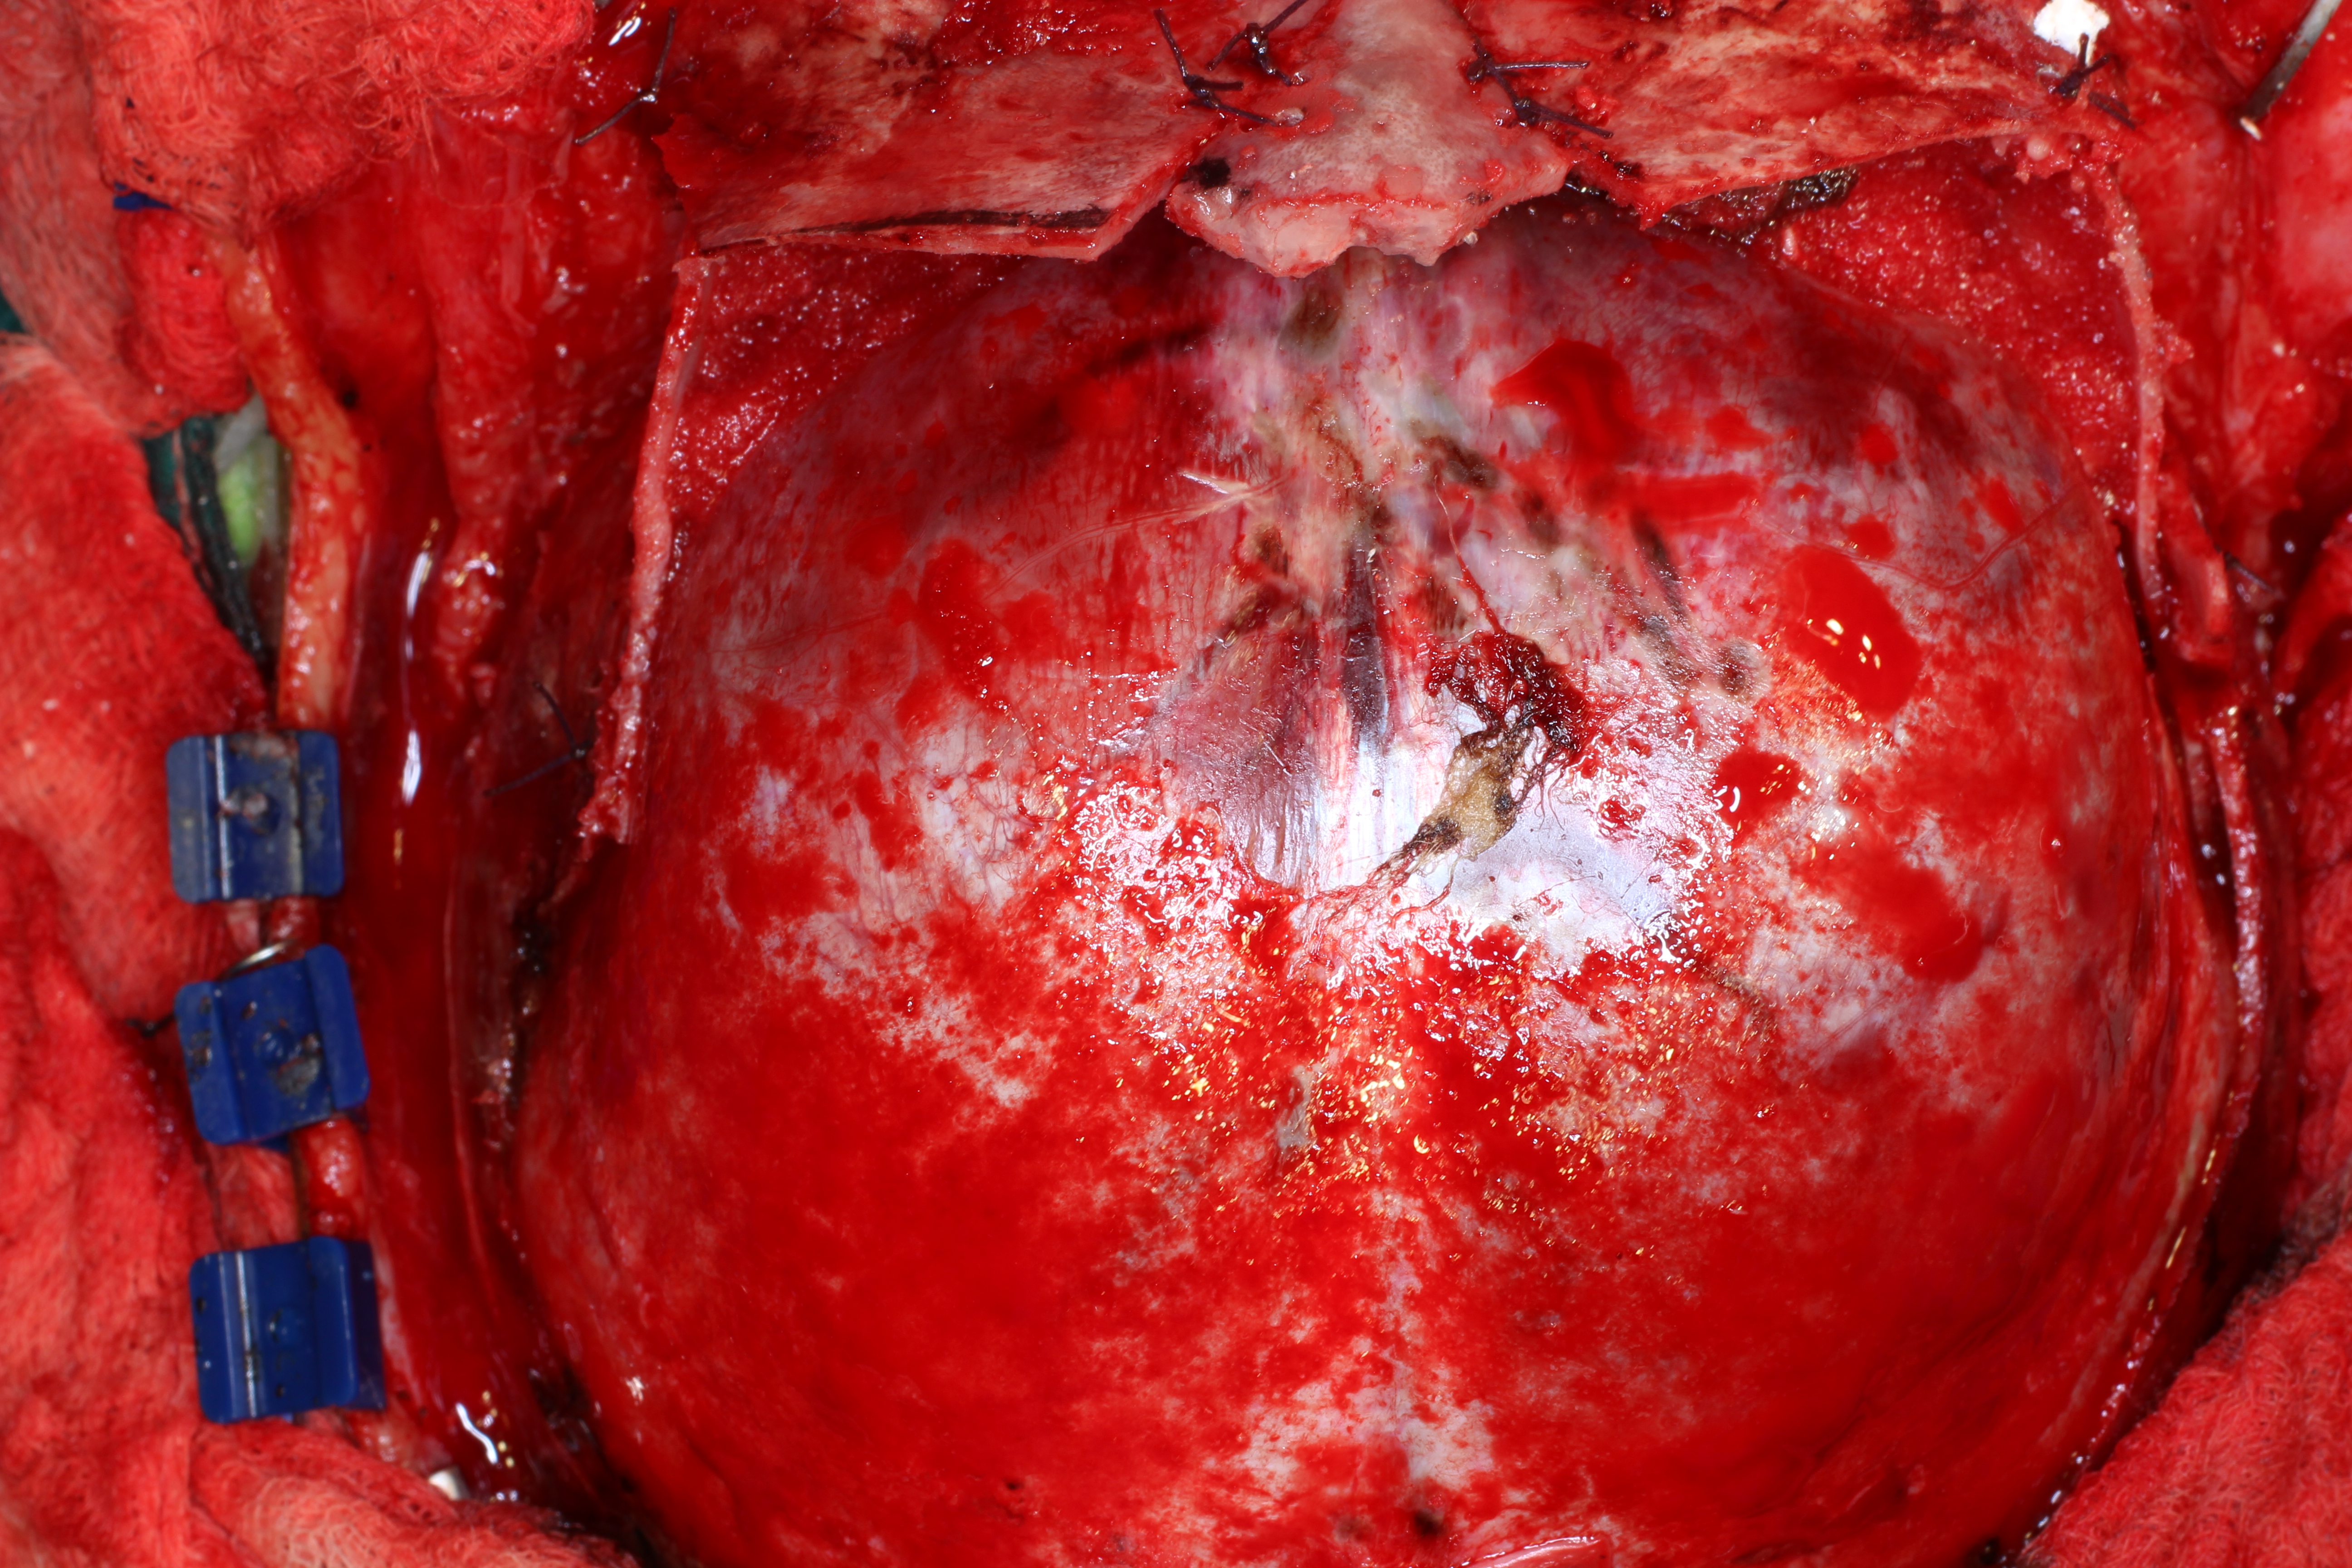
- Cover exposed dura with moist sponges while working
Carefully free frontal lobe from anterior cranial fossa floor
Drill burr hole for H bar in lateral orbital bone. This needs to be cut using footplate going lateral superiorly not straight superior to go through lateral orbit not superior orbit Protect orbital contents. Use footplate drill to connect to central separation. This is the frontal bar release. Repeat on contralateral. Use drill to make groove in the superior inferior orientation. This will be used to hold lateral advancement graft in place.
Address bone flap. Central ~triangular wedge removed using footplate drill inferiorly.
Nasal root bone wedge replaced. Holes drilles in wedge and frontal bone lateral to this. Vicryl sutures used to affix wedge in place. This move corrects hypotelorism.
Lateral strips removed from bone flap cut fro posterior lip to the suture. These will be used to fashion H grafts
Lateral strips removed from calvarium posterior to bone graft site. These will be trimmed to the appropriate size to replace laterally and stent the frontal/orbital bar forward. Use baby rongeurs to size lateral bar grafts. Place these in the grooves prepared earlier.
Use calipers to measure needed H graft Use a drill to burr H graft to needed size
Place H graft from orbit to anterior cranial fossa floor. Pack Avitene and Floseal around it for support. Rinse repeat.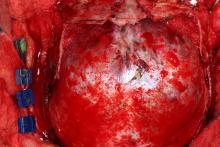
- Next address the metopic suture on bone flap. Split this sufficiently to splay the fused segments. May need to separate halves completely. Multiple bone cuts in each segment may be needed to create the desired contour of the frontal bone.
Paired suture holes are drilled in these bone flaps. 3.0 vicryl suture used to tag down directly to the dura mater. Stabilizes flaps and obliterates epidural space. May use spare bone from strips to cover exposed areas and affix using suture holes and Vicryl or neurolon.
Sonic weld resorbable plating system frontal bone to orbital bar. Resorbable plates made of the same material as Vicryl resorb in 6mo to 1.5 years. 2 hole width plates, Cut down plates to desired length. Use temperature controlled bath to heat, orient vertically and mold flush to bone.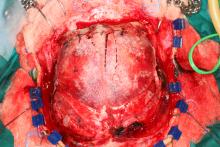
Use demineralized bone matrix (DBM) with “mixing solution” and bone pate from the earlier portions of case to create a bone pate. This is used to fill in all cracks and crevices left uncovered. - Remove hooks.
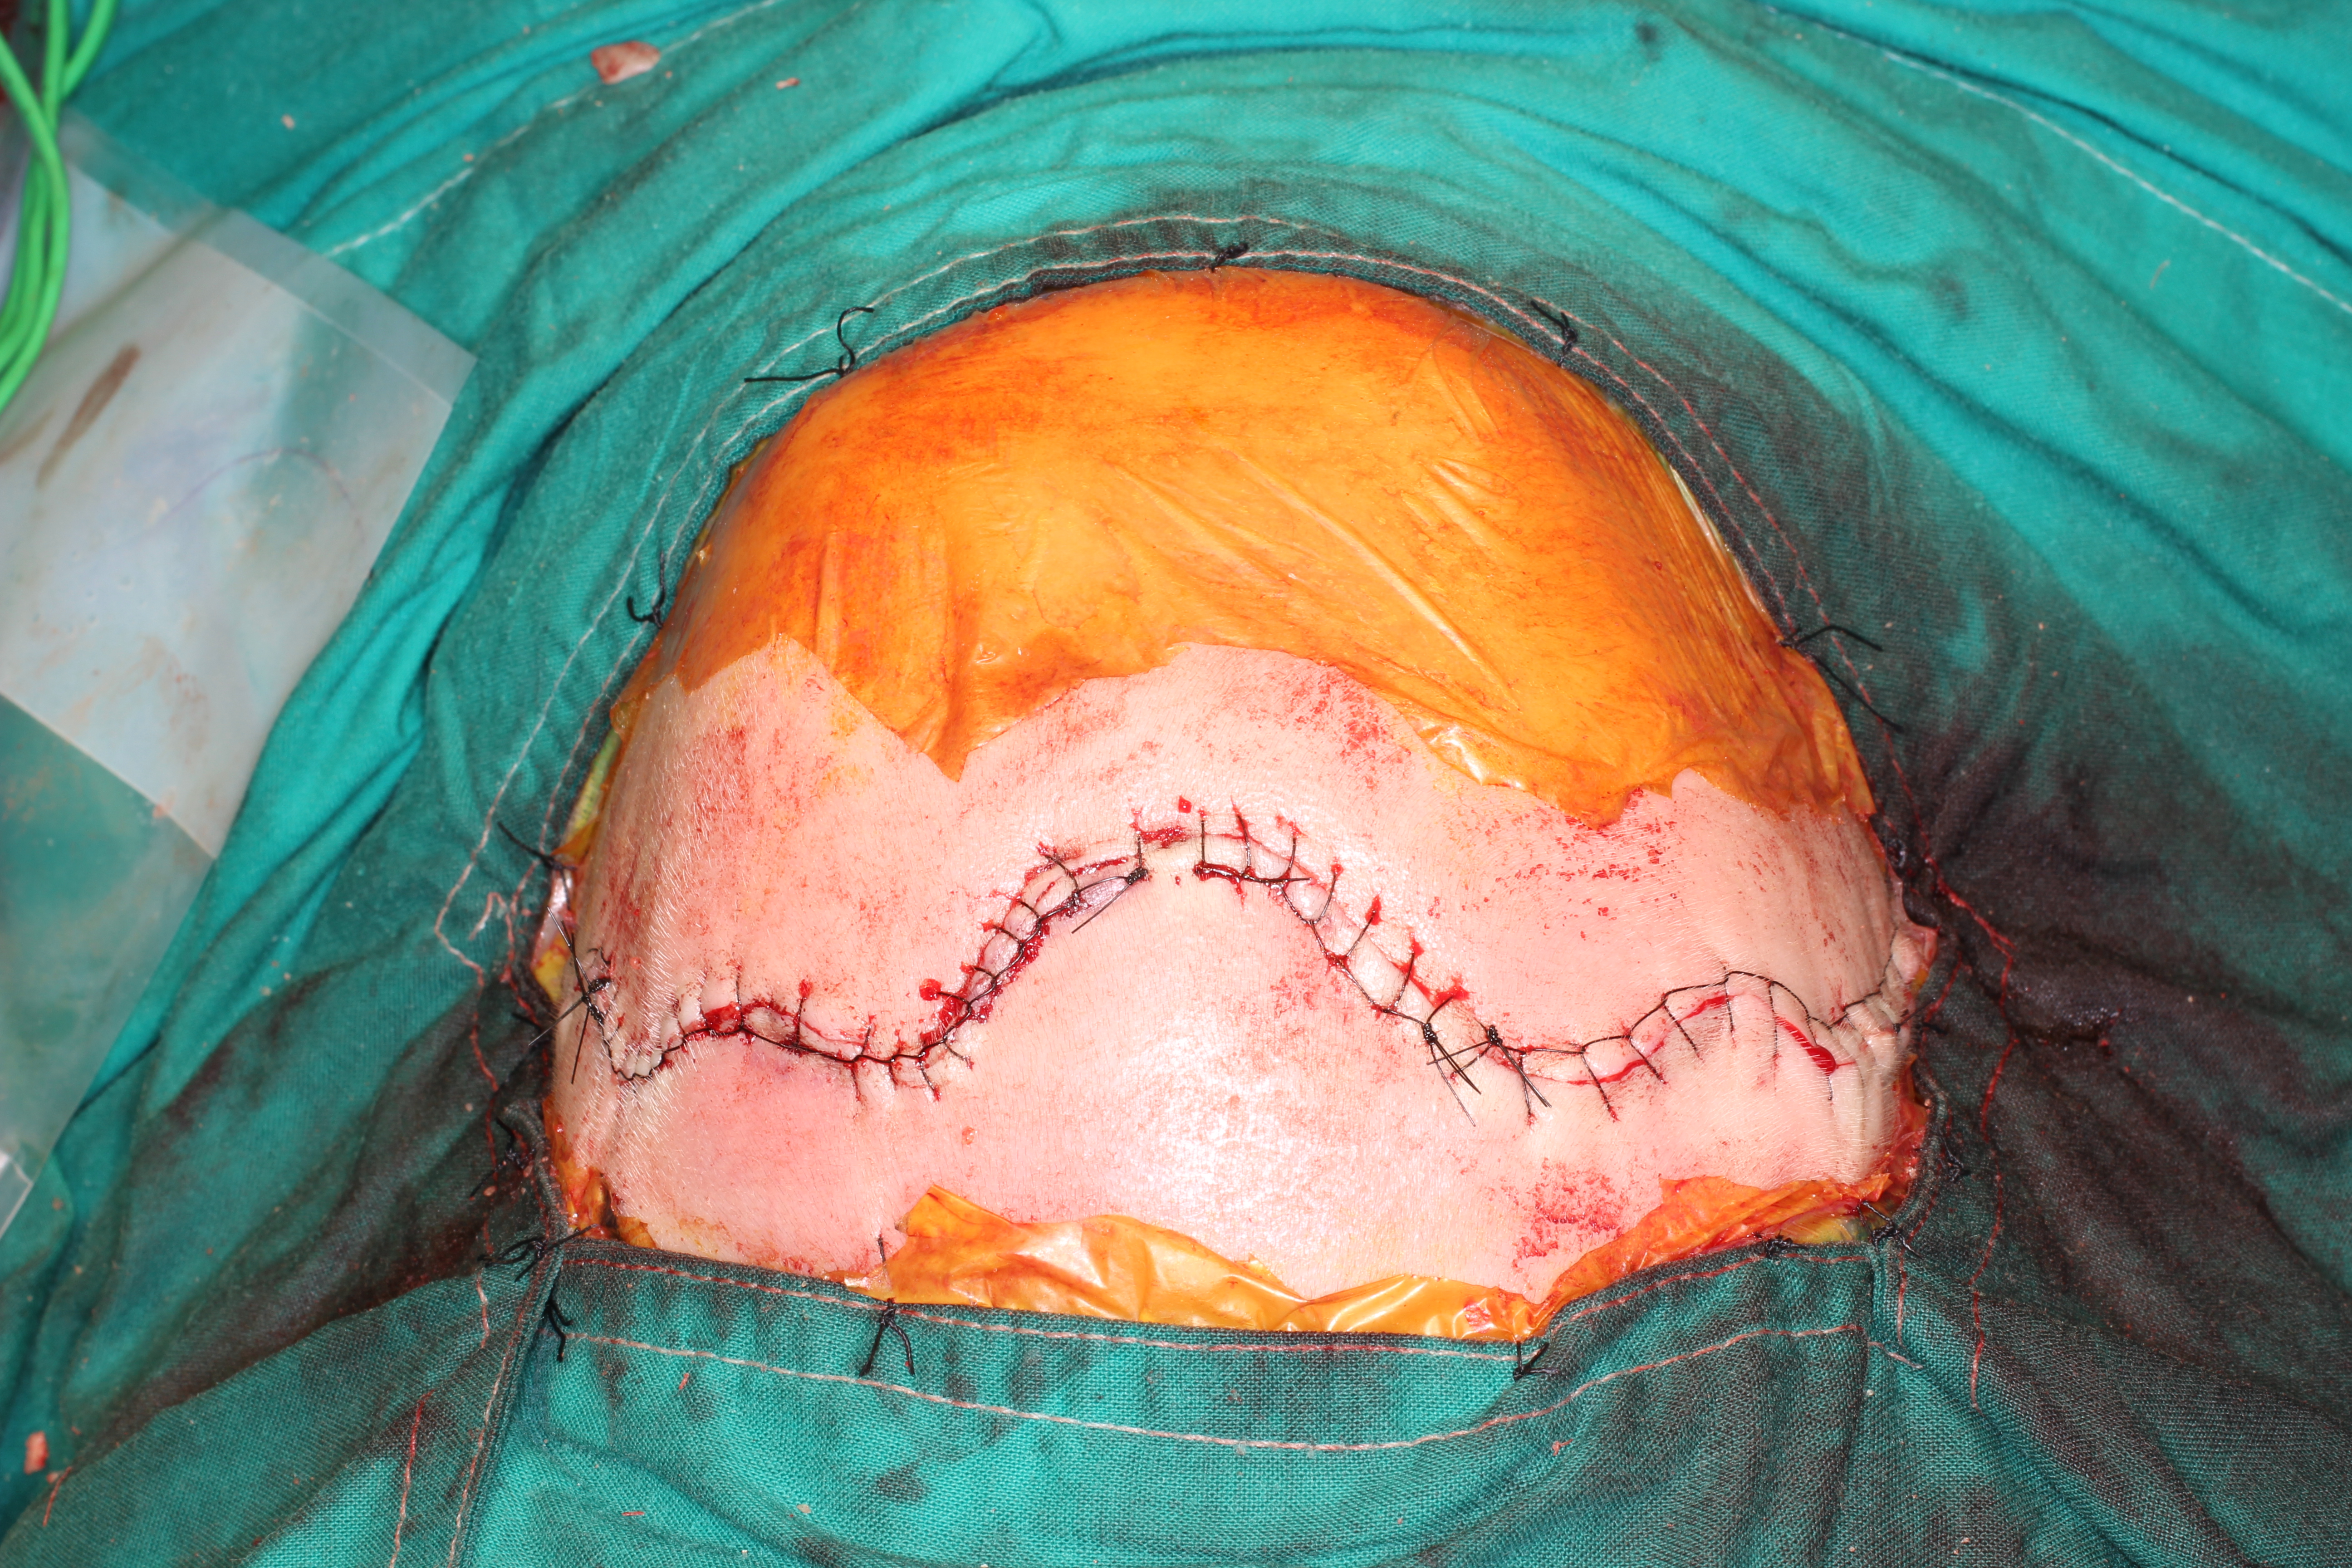
Use stay sutures (Wilson likes to use prolene) at vertex of your incision. Starting at vertex and with a partner starting at one corner remove clips one at a time and place\buried deep Vicryl sutures in parallel direction.
Close skin with running locked (Menezes) or regular running (Wilson) nylon suture.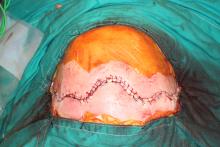
- Neurosurgery dressing: Baci. Adaptic. 4x4’s. Elastoplast, Kerlix, Stocking cap
POSTOPERATIVE CARE
- Consideration 1
- Sub-Con
- Sub-sub-con
- Sub-Con
- Consideration 2
- Sub Con
Sample Dictation
Patient was brought to MOR. General endotracheal anesthesia was induced. Peripheral IV lines and an arterial line were placed. The Table was turned 90 degrees from the anesthesiologist away from the door. All pressure points were padded. The patient was prepped and draped in a sterile fashion for a cranioplasty procedure. Time out was performed as per usual protocol with all team members in agreement. A curvilinear bicoronal incision was made with careful attention to hemostasis. First the scalp flaps were raised and the frontal bone craniectomy was performed including the fused metopic suture- please see the Neurosurgery note for dictation of that portion of the procedure. Once the frontal calvarium was removed, the frontal lobes were gently retracted to view the anterior cranial fossa. A cutting saw was used to remove a midline wedge in the frontal bar and an osteotome was used to extend the wedge to the nasal root. This wedge was removed. Using pilot holes to release the pterion and then footplate drill in orbital roof and into temporal bone, the frontal bar was released from the lateral orbit to the midline in order to advance it. This was seen to provide ample room for anterior/posterior growth. Lateral calvarial strips were fashioned into H shaped struts using diamond drills. The H struts were then placed in the orbital roof advancement to support the advancement under the floor of the anterior cranial fossa. Care was taken to protect the orbital contents. This was performed bilaterally and Avitene and Floseal were packed around these H struts. Lateral strips removed from calvarium posterior to bone graft site were also trimmed to the appropriate size to place laterally and stent the frontal/orbital bar forward. The nasal root bony wedge was then replaced deeper in a Y-to-V fashion to support the hypotelorism repair and secured using pilot holes and suture fixation. The bifrontal bone plate was then brought onto the field and examined for cranioplasty plans. A cut beside the ridge of metopic suture on the bone plate was made and the frontal bones then splayed sufficiently to provide ample bony coverage of the frontal lobes with nicely improved contour. Several other contour cuts were made to optimize shape. Pilot holes were drilled in all bony segments for suture fixation both to apposed bone segments and to underlying dura. Sonic weld plating system was used to affix the frontal bone to each of the orbital/frontal bars. 2 hole width plates were cut down to the desired length. Using a temperature controlled bath to heat, these were oriented vertically and molded flush to bone prior to insertion of sonically heated pins into predrilled holes. Free bony fragments were then placed on uncovered dura and affixed using pilot holes and absorbable suture. Demineralized bone matrix (DBM) with “mixing solution” and bone pate from the earlier portions of case were used to create a bone pate. This was used to fill in all cracks and crevices left uncovered. Hemostasis was checked. The temporalis muscle, scalp flaps and skin were then re-approximated - please see Neurosurgery note for the details of the this closure in which we assisted. The patient tolerated the procedure well and proceeded to a stable extubation and return to the post anesthesia care unit. Photodocumentation was taken.