Updated (11/2024) booklet attached as a PDF:  Tracheostomy Care Booklet.pdf
The University of Iowa Hospitals and Clinics (UIHC)
Department of Nursing
Iowa City, Iowa
To Contact UIHC Healthcare Team:
Call UI Health Care at: 319 – 356 – 0345 Monday to Friday from 8:00 a.m. to 4:30 p.m.
Ask to talk with the otolaryngology triage nurse. 1 – 800 – 777 – 8442 on nights, weekends, and holidays Ask to talk with the otolaryngologist on call.
See also surgical protocol: Tracheotomy - Tracheostomy
return to: Tracheostomy and Upper Airway Management Symposium July 30 2016 IAO and SOHN Iowa City Iowa
INTRODUCTION
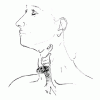
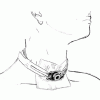
Having now had a tracheostomy tube in place (Figure V.D.2.1) you will be instructed and shown how to do your cares. It is good to practice these cares. A family member or friend should also learn your cares and practice helping you so that, if needed, someone can assist you at home. This attached booklet reviews what you will be taught and should be kept as a resource for you and your family or friend.| |
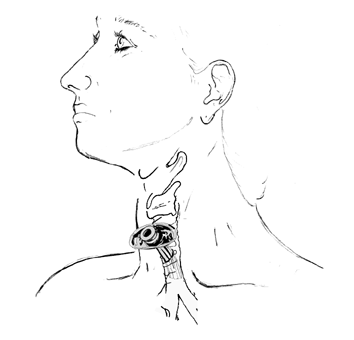
Fig. V.D.2.1. - A Tracheostomy is an Opening into the Trachea Through the Neck for Placement of a Tracheostomy Tube
THE TRACHEOSTOMY TUBE
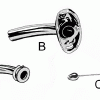
Most tracheostomy tubes have 3 parts (Figure V.D.2.2). The parts may not be used with another tube. The obturator is used to insert the outer cannula into the trachea. The obturator is removed after inserting the tube and should be kept handy for use should the tube come out. The outer cannula maintains the neck opening. The inner cannula is inserted into the outer cannula and locked into place and should only be removed for cleaning.
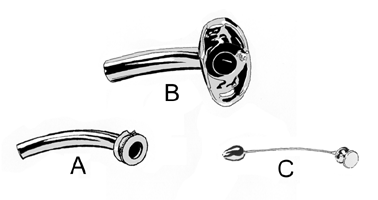
Fig. V.D.2.2. - Parts of the Tracheostomy Tube:
A. Inner Cannula.
B. Outer Cannula.
C. Obturator
HAND WASHING/CLEANING SUPPLIES
Because your hands may spread germs, you must wash your hands before and after all cares. Clean supplies must be used.
HUMIDITY
Extra humidity is required because the nose and mouth, which filter, warm, and moisten the air you breathe, are bypassed. The amount of moisture needed will vary. Use an ultrasonic nebulizer, a room-size or cool-mist humidifier in your home. Drinking plenty of fluids also helps to keep your airway moist. Increased humidity will be needed during the winter months when your home becomes dry. More moisture is needed whenever secretions become thick, dry, or form plugs. Pink or blood-tinged secretions may also indicate a lack of moisture. Putting (instilling) saline solution (a salt solution) into the trachea adds moisture and causes a cough to clear secretions from your airway.
MAKING SALINE SOLUTION
Saline solution is a salt solution that can be made by boiling water for 5 minutes, then adding 1 1/2 level teaspoons of noniodized salt per quart of water. Cool to room temperature prior to use. Because germs may grow in the solution, discard unused saline solution after 24 hours.
INSTILLING SALINE SOLUTION
The purpose of instilling saline solution into your airway is to stimulate a cough and clear secretions.
- Pour a small amount of saline solution into a clean cup.
- Draw up 2 to 3 cc into the syringe.
- While taking a deep breath, instill saline solution through the tracheostomy tube.
- Cough while covering your tube with a gauze sponge or soft paper towel.
- Repeat until your airway is clear. If unable to clear your airway with saline solution, use suction.
- When secretions become thick and dry, saline solution may need to be instilled as often as every hour.
CLEANING THE HUMIDIFIER
Germs will grow in a humidifier. Clean the unit to decrease the chance of respiratory infections. Refer to humidifier package insert for cleaning guidelines. Options for daily and weekly cleaning are listed below:
Daily
- Empty and clean tub with hot, soapy water. Rinse well.
- Fill with fresh tap water.
- Never add water to the humidifier without emptying and rinsing the tub.
Weekly
- Empty and rinse.
- Fill the humidifier tub with equal parts of vinegar and water and turn the humidifier on for 1 hour. Due to the strong smell of the vinegar, place the humidifier in a room where no one is present.
- Empty the humidifier and wash all parts with hot, soapy water. Rinse well.
- Fill the tub with clean water and turn on the humidifier for another hour.
- Empty and air dry. Unit is ready for use.
SUCTION
The purpose of suction is to remove secretions that you cannot cough out. Suction will clear your airway and help you breathe better. The correct size suction catheter should be used. The catheter should be half the size of the tracheostomy tube.
- Connect suction catheter to tubing from suction machine.
- Moisten the catheter tip with saline solution.
- Take 4 to 5 deep breaths.
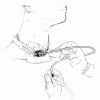
- Gently insert the suction catheter through the tracheostomy tube. Do not cover the suction control vent while you insert the catheter. Pass the catheter as far as you can without force, then withdraw slightly before starting suction (Figure V.D.2.3).
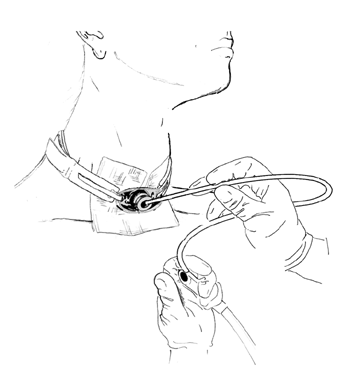
- Fig. V.D.2.3. Thumb Off the Suction Control Vent
- To apply suction, cover the vent with your thumb. Do not apply suction for more than 10 seconds. Release thumb from vent if you feel the catheter grab during suction. Gently rotate the catheter as it is withdrawn (Figure V.D.2.4).
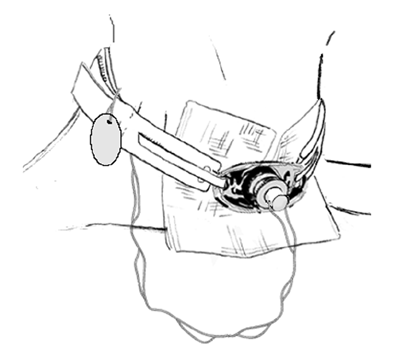
- Fig. V.D.2.4. - Tracheostomy Cork
- Suction saline solution to clean the catheter.
- Do not insert the catheter more than 3 times during a suction period. If more suction is needed, allow yourself a 5- or 10-minute rest.
- Breathe deeply after the catheter is removed.
- In most cases, the use of saline solution and a humidifier keeps your secretions thin enough to cough or suction out. If you have thick secretions, mucous plugs, or a feeling that your airway is not clear, the following may help:
- Fill the bathtub with hot water and sit in the steam-filled bathroom for 20 minutes.
- Place a moist all-gauze square over your tracheostomy tube. Keep gauze damp. The gauze may be held in place by folding it over twill tape or bias tape tied around your neck.
- Stand in the shower with water directed away from your tracheostomy tube.
- Fill a spray bottle with saline solution and spray into your tracheostomy tube several times a day.
CLEANING THE INNER CANNULA
To ensure that the inner cannula does not become plugged, it must be cleaned.
- To unlock and remove the inner cannula, turn it until the notch area is reached and slide it out.
- Use a small brush or pipe cleaners to clean the inner cannula under cool running water.
- Look through the inner cannula to make sure it is clean. Shake the inner cannula to remove excess moisture.
- Reinsert the inner cannula and lock in place.
USE OF A TRACHEOSTOMY CORK
If your doctor allows you to cork your tube, do so as directed (Figure V.D.2.4).
- Secure the cork string to the tube tie.
- The cork should be removed for shortness of breath or to cough out secretions that you cannot handle through the nose or mouth.
- Continue to clean your inner cannula. Remove cork when cleaning and replace.
SKIN CARE
Skin around the tube should be kept clean and dry.
- Q-tips or a damp washcloth may be used to gently clean around the neck opening.
- Gauze may be placed under the ties next to the skin. Hold the tube while changing the gauze.
- Change the gauze if it becomes wet, dirty, or frayed.
- Look for redness or skin breakdown.
- Use of dilute betadine soaked drain sponges for 10 minute applications followed by placement of dry drain sponge may be recommended. see: Tracheotomy stoma care Tracheostomal care Tracheostomy stomal care
CHANGING THE TRACHEOSTOMY TIE
- Different ties can be used, such as twill tape, bias tape, or Velcro tube holders.
- Change the tie when wet, dirty, or frayed. Plan to do this when you have someone to help you.
- The clean tie should be in place before soiled tie is removed.
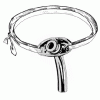
- If using twill tape or bias tape, cut a piece of tape approximately 30 inches long (Figure V.D.2.5).
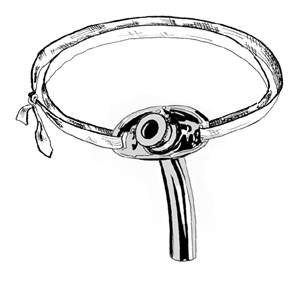
- Fig. V.D.2.5. - Tracheostomy Tie
- Insert tie through opening in the neck plate and bring it around to the other side of the neck.
- Insert this same end through the other side in the neck plate and pull it through. Secure the tie in a triple knot at the side of the neck.
- Make sure the new tie is not too tight or too loose. You should be able to slip 1 finger under the tie.
- Remove the old tie.
- If the tie stretches with wear, retie it.
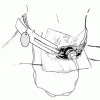
- If using a Velcro tube holder (Figure V.D.2.6).
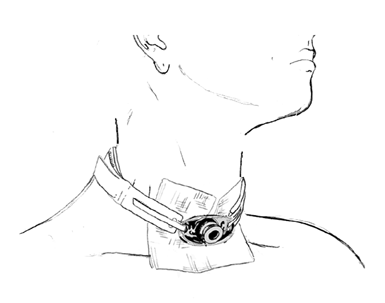
- Fig. V.D.2.6. - Tracheostomy Velcro Tube Holder
- Thread narrow Velcro tabs through opening in the neck plate.
- Adhere tabs to soft material on the band.
- Adjust and secure to fit your neck.
- Cut off excess band.
CHANGING/REPLACING THE TRACHEOSTOMY TUBE
An extra tube will be sent with you. If you have been instructed to change your tube, this is done about once a week.
- Prepare the clean tube:
- Insert the tie into the opening of the neck plate.
- Place the obturator inside the outer cannula (Figure V.D.2.7).
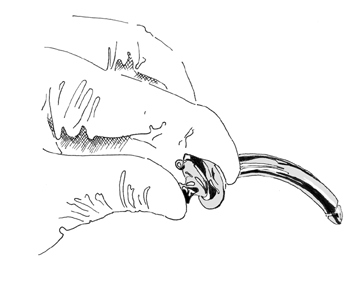
- Fig. V.D.2.7. - Obturator in the Outer Cannula
- Moisten the lower portion of the tube with saline solution.
- Hold the tube that is in place as you cut the tie.
- Take a deep breath before removing the tube.
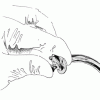
- Remove the soiled tube and insert the clean tube (Figure V.D.2.8).
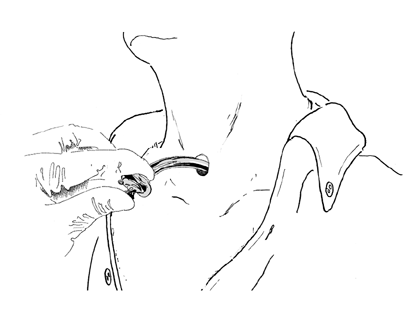
- Fig. V.D.2.8. - Inserting the Clean Tube
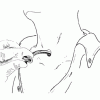
- Quickly remove the obturator, take a breath, and secure the tie or Velcro tube holder (Figure V.D.2.9).
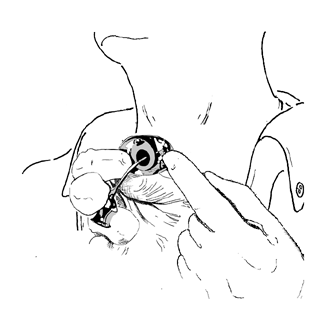
- Fig. V.D.2.9. - Removing the Obturator
- Insert the inner cannula.
- If the tube comes out and needs to be replaced:
- Place the obturator inside the outer cannula.
- Moisten the lower portion of the tube with saline solution.
- Insert the tube.
- Remove the obturator.
- Insert the inner cannula.
CLEANING THE TRACHEOSTOMY TUBE
After the tube is changed, clean the dirty tube and store until the next tube change.
- Clean plastic tubes with mild soap and water or equal parts of hydrogen peroxide and water. Rinse well, air dry, and store in a clean, covered container.
- Clean metal tubes with mild soap and water. Rinse well, air dry, and store in a clean, covered container.
- Hydrogen peroxide may be used to clean stainless steel tubes if rinsed well. Do not use with sterling silver tubes.
CLEANING THE SUCTION CATHETERS
- Place catheters under cool running tap water to rinse secretions.
- Wash catheters well in hot soapy water (mild liquid soap) and rinse with tap water. It may be helpful to attach the catheter to suction to remove any remaining soapy water.
- Soak catheters in equal parts of white vinegar and tap water (1 cup vinegar to 1 cup water) for 1 hour. Rinse catheters with saline solution. Connect catheter to suction to rinse inside of each catheter.
- Air dry catheters on a clean towel.
- Store catheters in a clean, covered container.
CARE OF THE SUCTION MACHINE
- Empty suction bottle into the toilet.
- Wash the suction bottle and tubing daily with hot, soapy water.
PRECAUTIONS
- When bathing or taking a shower, keep water out of tube. Do not swim.
- Avoid powders, aerosol sprays, dust, smoke, and lint from facial tissues.
- Do not use over-the-counter antihistamines (cold medications), which dry secretions and the airway.
EMERGENCY INFORMATION
- Talking on the telephone may be difficult. Plan a way to get help in case of an emergency. Place emergency numbers near the phone, such as the fire department, ambulance, visiting nurse, or doctor.
- During cardiopulmonary resuscitation (CPR), breathing must be performed mouth to tracheostomy tube not mouth to mouth.
- A medical alert bracelet/necklace from a drug store (Figure V.D.2.10) should be worn. Information can be etched on the back of the bracelet/necklace to inform others that you breathe through a tube in your neck.
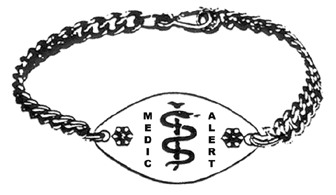
- Fig. V.D.2.10. - Medical Alert Emblem
DISCHARGE INFORMATION
Before you leave the hospital, a visiting nurse may be contacted to assist you with your home care and help you obtain supplies. Supplies may be obtained from a drugstore or medical supply company. Arrangements for a suction machine, if needed, will be completed before you leave the hospital. Most patients rent the suction machine. The need to suction may decrease over time. Return the suction machine when no longer needed. Arrange to have a humidifier at home.
HOME SUPPLIES
The following will be sent home with you:
- Sterile saline solution
- 5 cc syringes for instilling saline solution
- Sterile container for saline solution
- Gauze squares to use when coughing (soft paper towels can be used)
- An extra tracheostomy tube
- Tracheostomy dressing
- Tracheostomy ties and/or Velcro tube holder
- Tracheostomy brushes/pipe cleaners
- A plastic basin for cleaning the inner cannula/tracheostomy tube
- Suction catheters
- Tubing for suction machine (if not supplied by medical equipment company)
WARNING SIGNS
Please notify your doctor or local emergency room if you feel you are having any of these problems:
- Tracheostomy tube comes out and you are unable to replace it
- Difficulty breathing
- Increased tracheal secretions
- Thick, foul-smelling secretions
- Chest discomfort
- Dry, crusted secretions (mucous plugs) or blood-tinged secretions from the tracheostomy tube
- Fever
- Open skin, sores, or increased redness around the tube
